

-
Direct To Garment (DTG) 0
-
Getting Started 19
-
Texjet® Garment Printers 58
-
Textile Applications 30
-
RIP Software 27
-
PreTreater Pro 15
-
Troubleshooting 20
-
-
Direct To Film (DTF) 1
How to archive your print jobs in Digital Factory Apparel Polyprint Edition v10

Digital Factory Apparel Polyprint Edition is a printing software that gives the user endless opportunities that allow him to alter the digital files to his likings and this way, to achieve an outstanding outcome. It’s vital to save your print jobs, due to numerous hours spent on editing a design to your preferences. By archiving them, you can print them instantly, without adjusting settings and choosing features all over again.
To archive your preconfigured digital files, follow the steps below:
Step 1
Import your digital file, choose the desired settings and make the proper adjustments.
Basic printing process with Digital Factory Apparel Polyprint Edition v10
Step 2
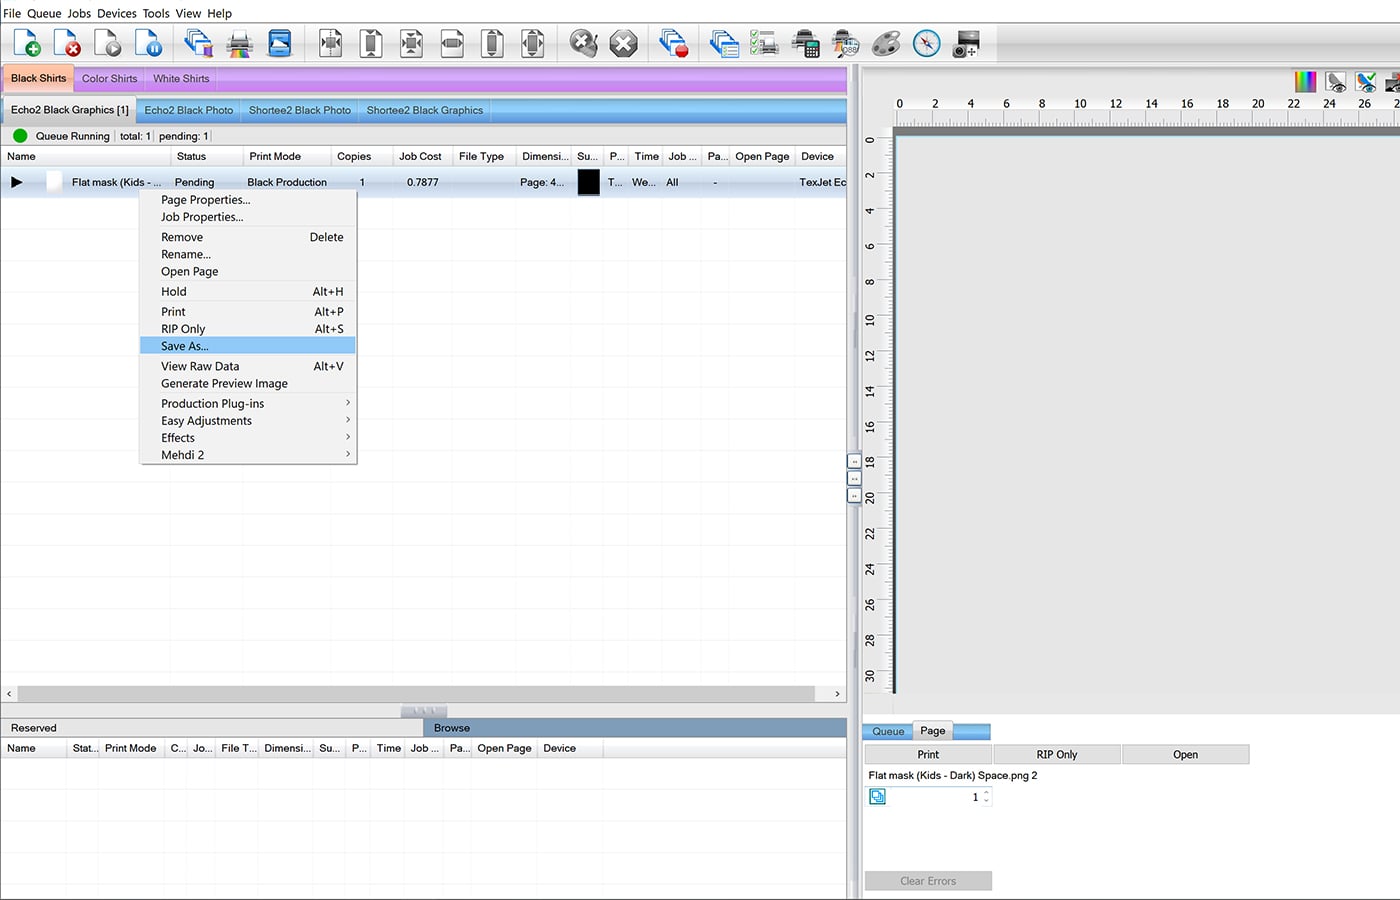
Right click on the image at the print queue and choose Save As. You can save it in the destination that is appointed or in any other folder on your computer.
Note: Make sure that you save the file as Job Backup type (jbk).
Step 3
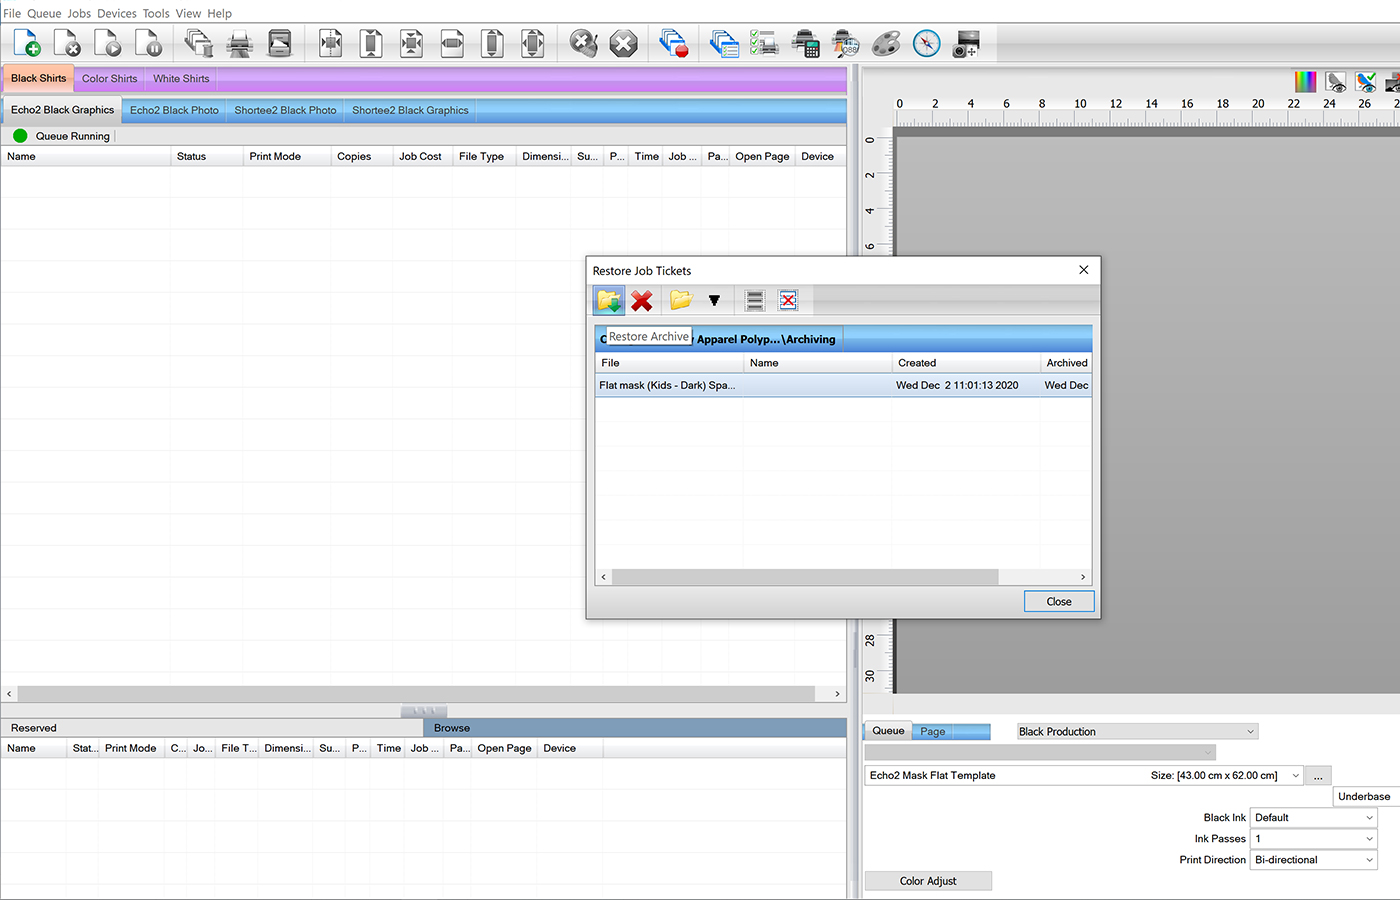
To restore your archived image, select Jobs at the main toolbar and then Restore Jobs. From the window that pops up, select your file and tap on the Restore Archive icon. If you have saved it in another file, click on the File icon to navigate. When the loading is finished, press Close.
Note: Keep in mind that the file when archived, is saved with the settings made in the print queue that was uploaded. So, it only makes sense to reuploaded it in the same print queue.
Step 4
You are ready to print your file. Of course, if you want to make any kind of new adjustment, you are allowed to, but these changes won’t be saved, unless you follow the archive procedure described previously once again.


