

-
Direct To Garment (DTG) 0
-
Getting Started 19
-
Texjet® Garment Printers 58
-
Textile Applications 30
-
RIP Software 27
-
PreTreater Pro 15
-
Troubleshooting 20
-
-
Direct To Film (DTF) 1
How to save your custom print media in Digital Factory Apparel Polyprint Edition v10

The custom print media feature is one of the most useful tools that Digital Factory software provides. The user can create custom preconfigured templates, where the print job always takes place at a preconfigured area, with exact print dimensions and shape. In addition, with the fixed graphic option, logos, signatures and watermarks can be printed automatically.
Creating a custom print media can be quite time consuming, due to all the settings the user must go through; hence, it is the smart choice to save your custom print media. By archiving them, you can use them at any moment, without having to readjust settings and choosing features all over again.
In order to save your custom print media, follow the steps below:
Step 1
Create your custom print media, by choosing the desired settings and making the proper adjustments.
How to create custom print media in Digital Factory Apparel Polyprint Edition v10
Step 2
Select from the top bar Devices and then Manage Print Media.
Step 3
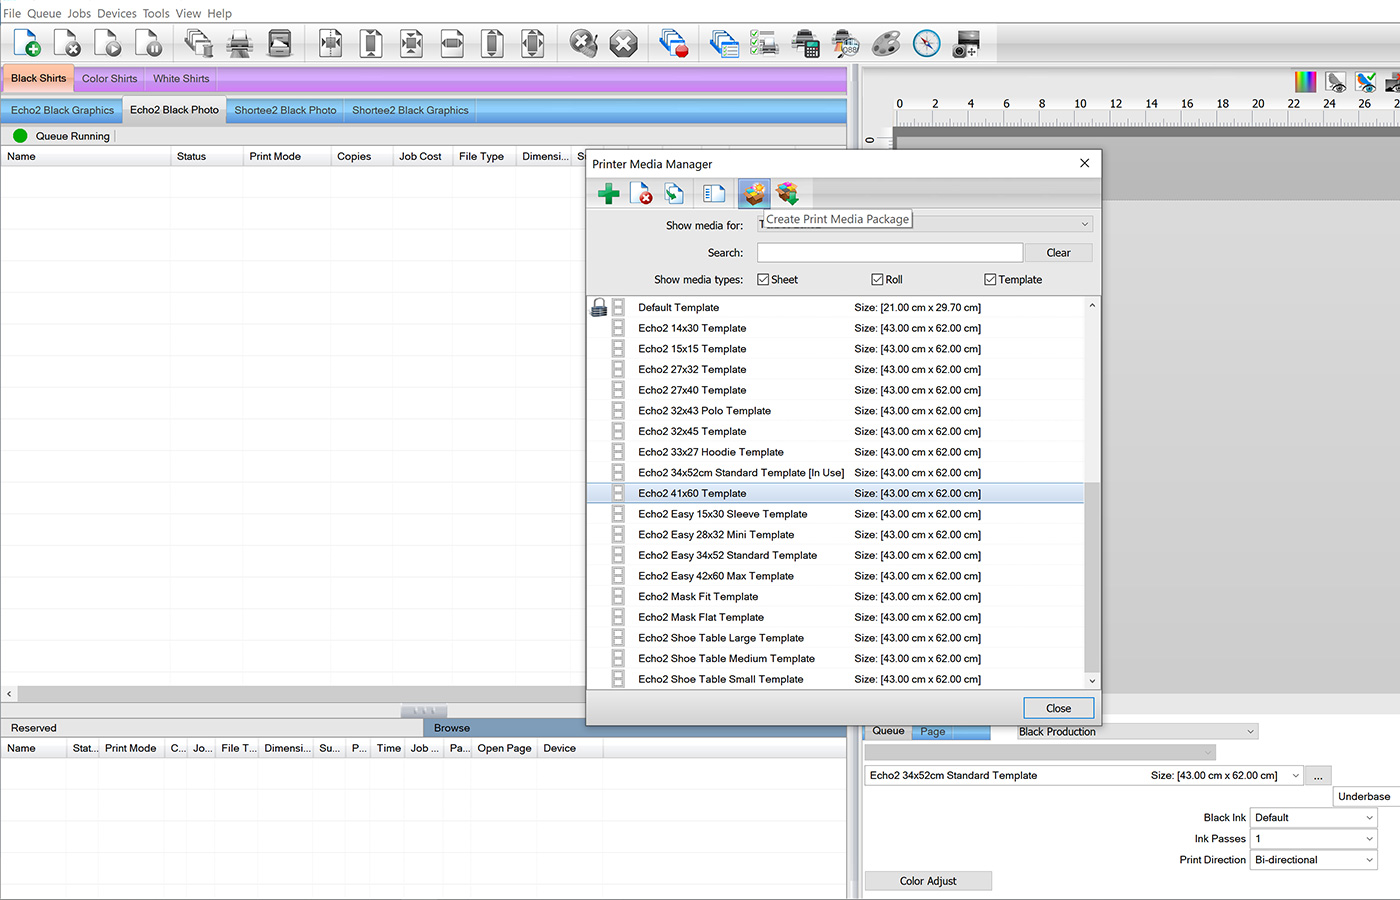
At the window that pops up, select the print media that you have created and select the Create Print Media Package icon. You can save it in the appointed destination or in any other folder on your computer. Then, press Close.
Step 4
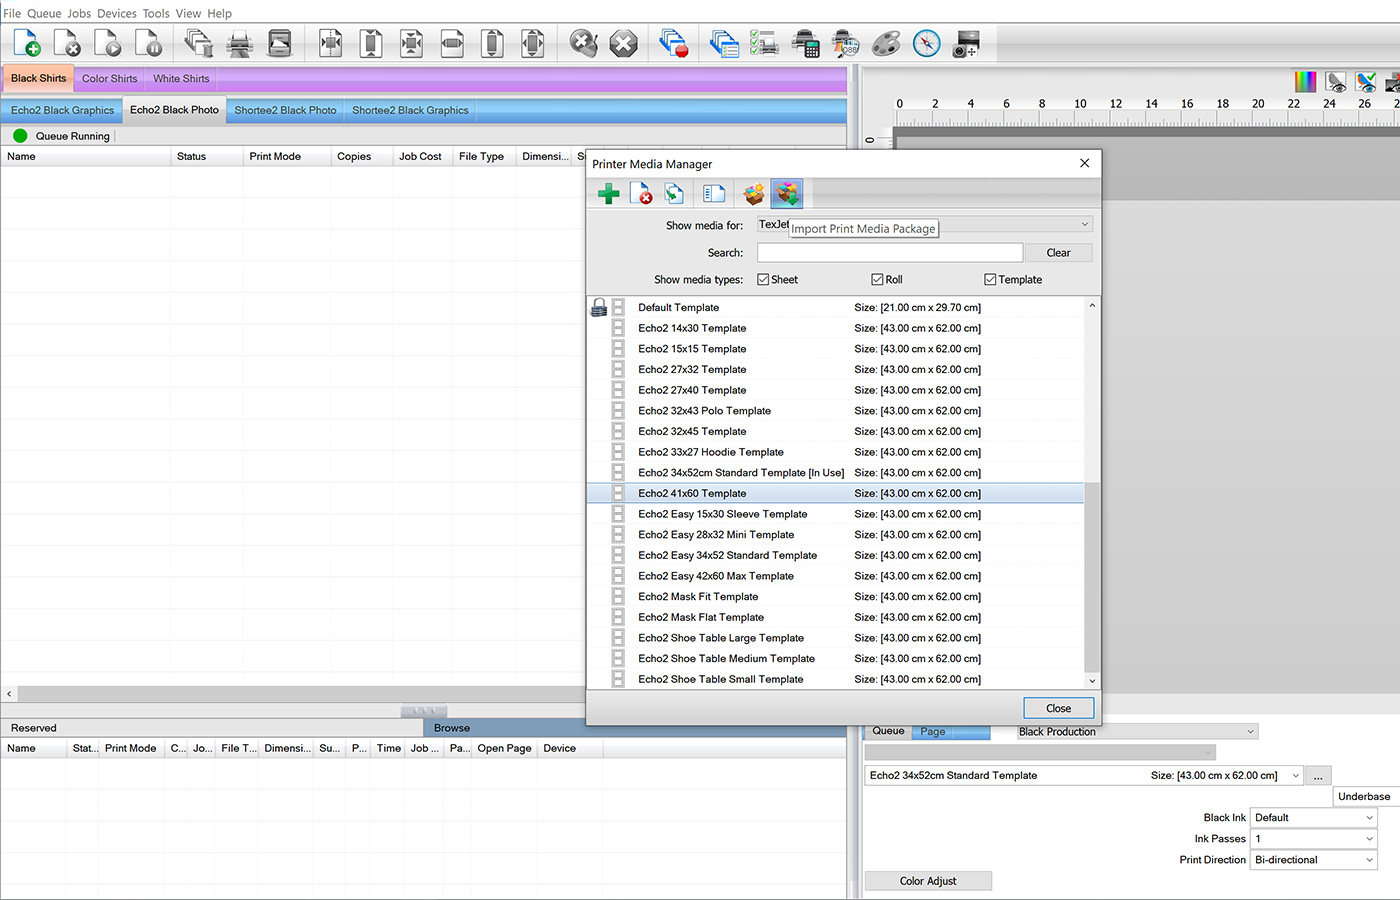
To restore your custom print media, select from the top bar Devices and then Manage Print Media. From the window that pops up, tap on the Import Print Media Package icon, select your print media and click Open. When loading is finished, press Close.
Note: If you are equipped with more than one printer, make sure that you have selected the right printer in the “Show Media for” section.


